;)

;)


;)
;)
;)
;)
;)
;)

;)
;)
;)
;)
;)
;)
;)
;)

;)
;)
;)
;)
;)
;)
;)
;)
;)
;)
;)
;)
;)
;)
;)
;)
;)
The Intelligent Agents tool allows Instructors to set up automatic notifications to be sent to themselves and students when specified course performance criteria are met. It can be used to both recognize student achievement (i.e., a high score on a quiz) and warn of potential problems (i.e., lack of online activity or poor performance on an exam). The following images demonstrate the process of creating an Intelligent Agent.
Step 1
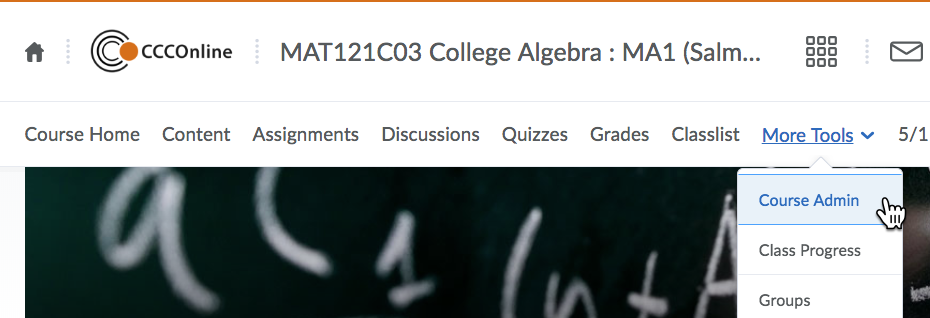
In the course in which you want the Intelligent Agent, select Course Admin from the More Tools drop down menu:
Step 2
In the Communication category>Click the Intelligent Agents link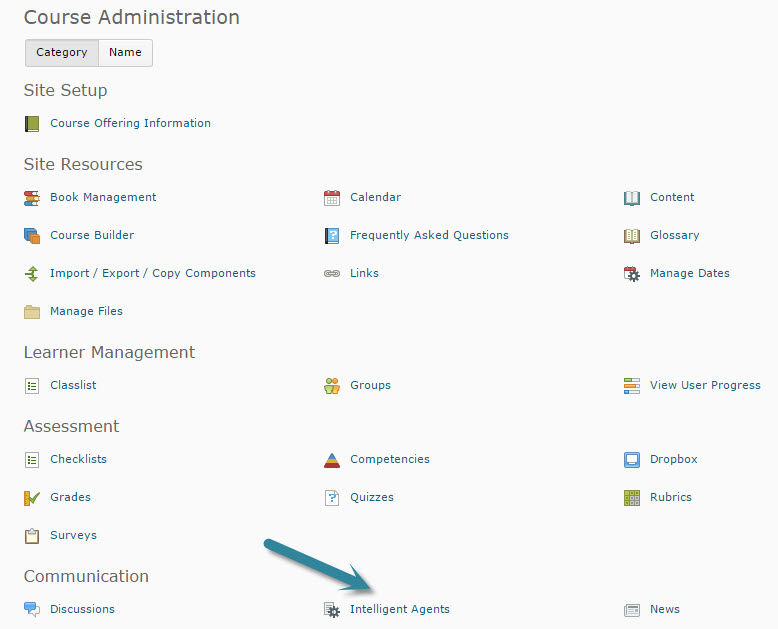
Step 3
From the Agent list window>Click Settings, the gear in the upper right hand corner
Step 4
Choose Set custom values for this course radio button and enter your full name and CCCS email. Then click Save.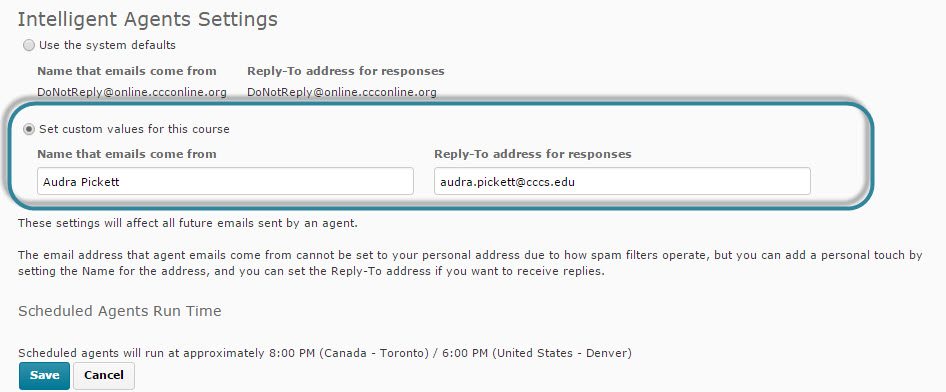
Step 5
From the Agent List Window>Click the New button.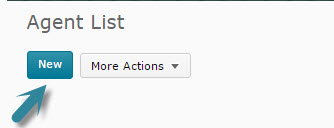
Step 6
In the New Agent window, Give your agent a name and description by typing in the Agent Name and Description text boxes.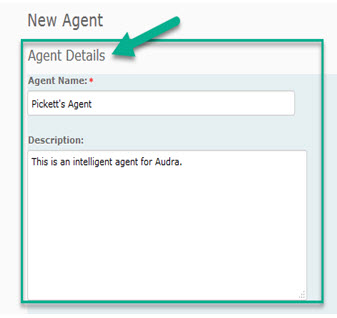
Step 7
From the New Agent window, setup the agent criteria in the Role in Classlist, Login Activity and/or Course Activity sections. 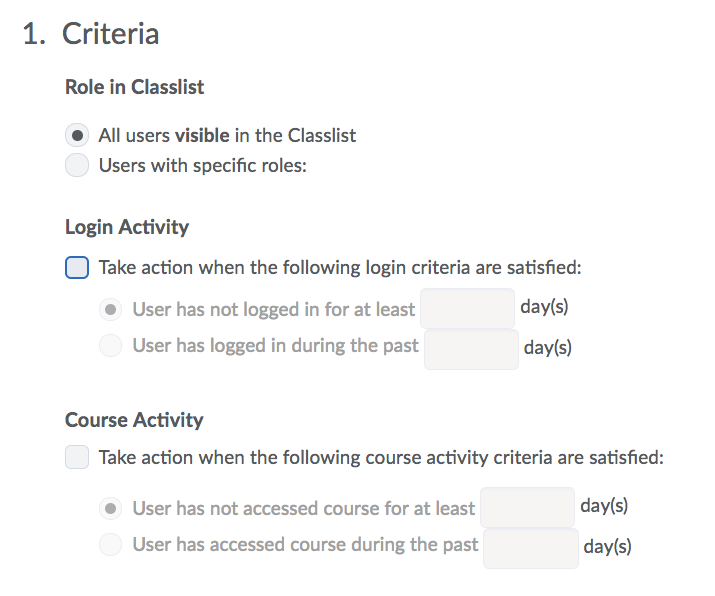
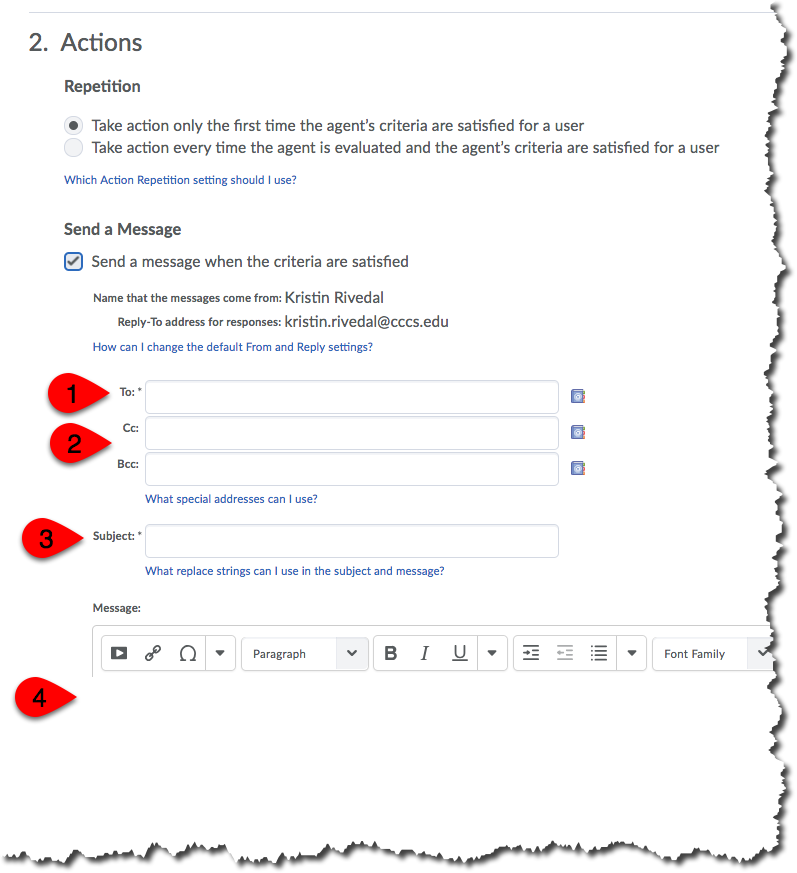
Step 8
From the New Agent window, setup of the Actions section.
The Repetition section allows you to choose whether to send the notification only the first time or every time the criterion is met.
In the Send a Message section you will define to whom messages are sent. When an agent runs, when a user meets that agent’s criteria (or the first time, depending on the selections made in the Repetition section), it will trigger and send an email.
- In the To: field, enter the address the email should be sent to. If you want the email to go to the user who triggered the agent (for example, the student who didn’t login for the past week), enter {InitiatingUser} instead of an email address. This replacement string will be traded out for the user's D2L internal messaging address when they meet the criterion.
- In the CC: and/or the BCC: field, you may enter your D2L internal messaging address OR your CCCS.EDU email account (note that this is the only time you may use an external email address from within D2L.)
- A Subject line is required. If you are interested in using replacement strings in this line, click the blue text beneath the subject text box to see the other options available. These may also be used in the message body (4) to further personalize the message.
Use the Schedule section to set a schedule for how frequently to run a check for the selected criteria, select the Use Schedule checkbox and then click the Update Schedule button.

From the Update Agent Schedule window, set your desired schedule and then click Update.
*Note: Be sure to set the end date as the last date of the semester.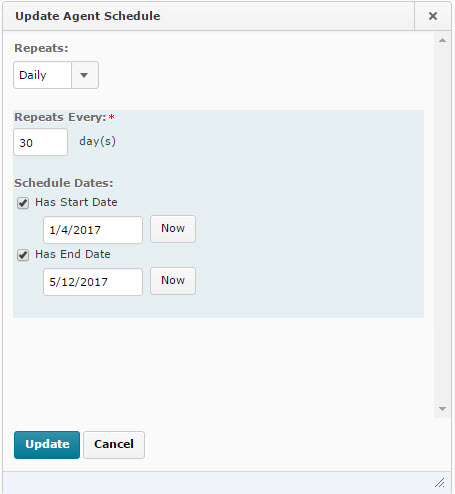
Step 9
NOTE: For a list of other strings you can use in these fields, see D2L’s Replace Strings for Agents documentation.
Click Save and Close and your new intelligent agent will be created.
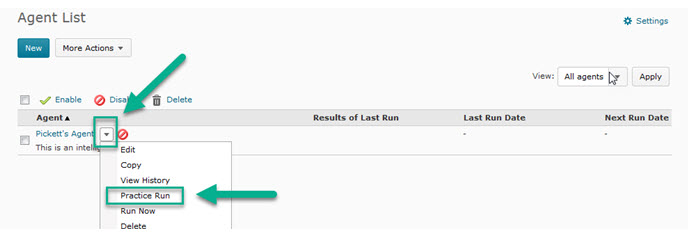
Step 10
To try a practice run of your agent, click the dropdown arrow next to the agent name and select Practice Run. Then choose Run in the popup window that opens. The agent will identify users that meet its criteria, but it won’t send any actual emails. You can see the results under View History (see next step).
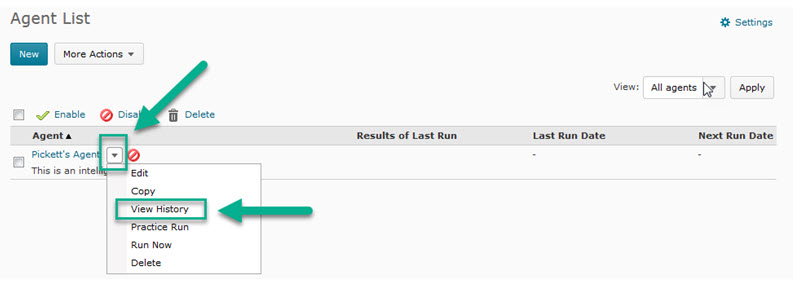
Step 11
To view the history of previous runs (including who received emails and when), click the dropdown arrow next to the agent name and select View History.