Use the following information to get the HOL Lab/Lessons setup for your course. Be sure to read this article to further understanding student requirements and how to best support the use of HOL labs in this course.
Prior to the start of the term
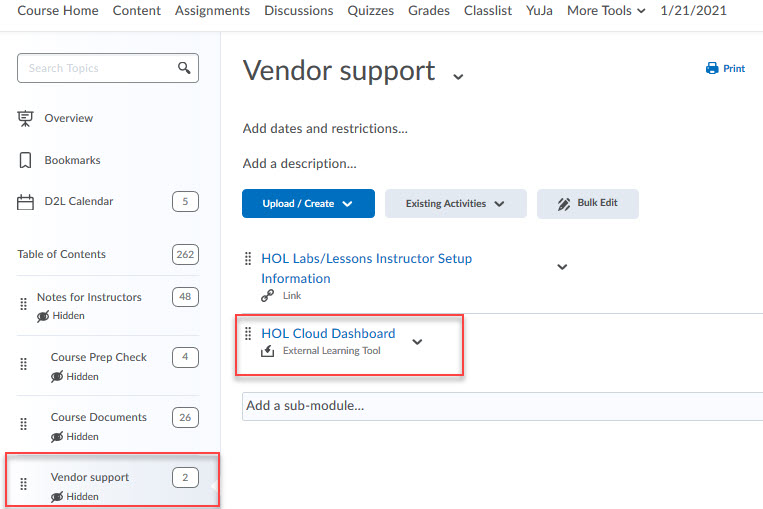
- Enter your D2L course enter Content>Notes for Instructors, Vendor Support>Click the HOL Dashboard link
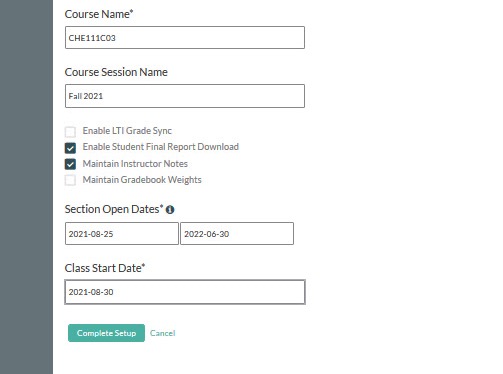
- From Master Lesson window enter the following information:
Course Name: XXXC0X [needs to match your D2L section]
Course Session Name: SPXX, FAXX, SUXX [enter the appropriate term]
Set the Open Dates: Choose today for the open date and one year out for the end date
Class Start Date: Select the course start date
Check boxes: Only check "Enable Student Final Report Download" and "Maintain Instructor Notes" - Click the Complete Setup button to create the associate HOL Cloud section for your course
- Accept the license agreement by check 'have read...' checkbox>Click the Accept button
- The HOL Dashboard will load in a new window for you to confirm the setup is complete.
Important Things to Note:
- Read through the HOL Lab KB articles below so that you can answer student questions. The biggest source of confusion is likely to be the process for submitting labs.
- We will not be using the HOL Cloud gradebook or point values on the labs
- Students will submit their labs on the HOL Cloud when they finish. Then they use the Print menu on their browser to save a PDF of their final results to their desktop. They will then submit the PDF to the appropriate assignment folder in D2L. NOTE – for Physical Science courses, some of the labs will be “Formal” and students will create a totally different lab document to turn in.
Familiarize yourself with the HOL Lab Access
Course Dashboard
There are two ways to access the HOL Cloud dashboard. One way is to click on the HOL Cloud link in Notes for Instructors>Vendor Support. [this link is only available to instructors] The other way is to click on any lab link in the Content>Module X>Labs. Either way, you will land on the instructor view for the HOL Cloud dashboard.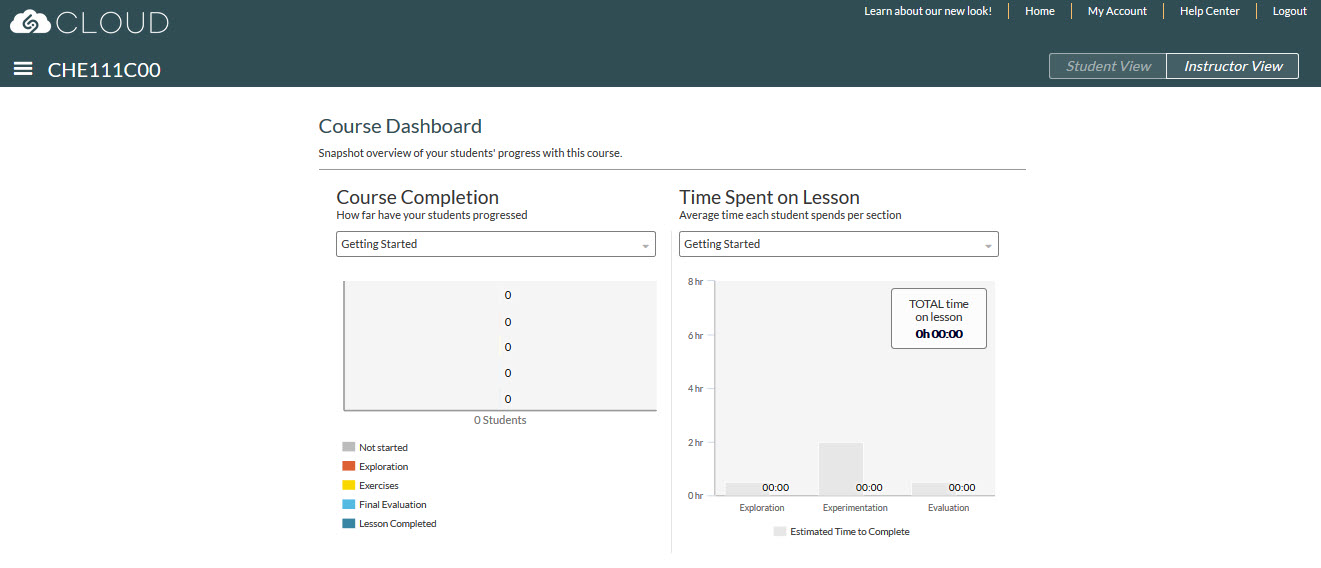
By clicking on the dropdown menu under Course Completion, you can choose any of the labs/lessons to see the graphic for class progress. Note the key under the graphic that indicates the lab sections.
At the bottom of the page, the Student Overview lists the lesson progress for each student. A grey circle indicates a lab in progress. A dark green circle indicates a completed lab. Hover over any circle to unlock and allow for a resubmission after lab has been completed or to download final results.
If a student is having trouble creating a PDF of their final results, the instructor may choose to download the file from the Instructor View. The students DO NOT have that option built into their view. NOTE – this would be for the Informal lab reports for Physical Science courses.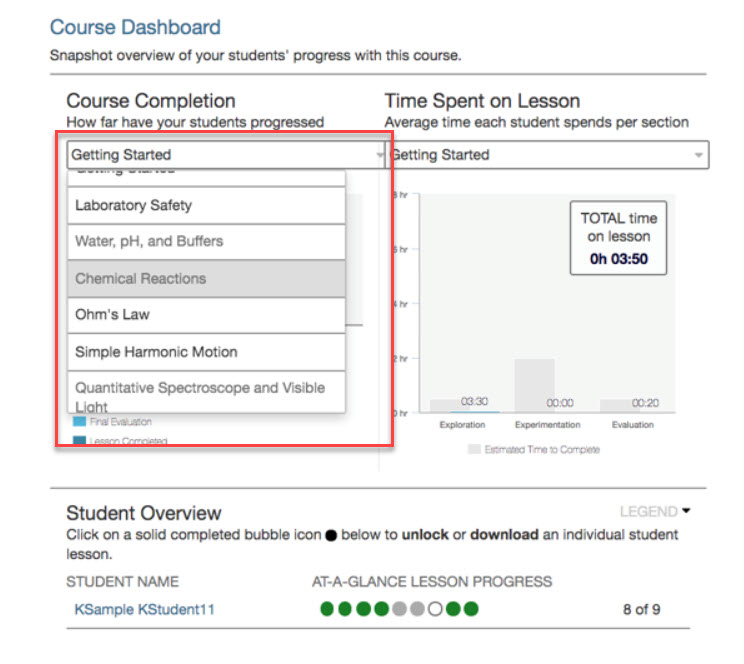
Student View
Click on Student View option in the upper right hand corner of the dashboard to work through a lab as a student would experience it. 
HOL Cloud Features
From the dashboard>Click on the book icon in the upper left corner and navigate to various features of the HOL Cloud through the dropdown menu.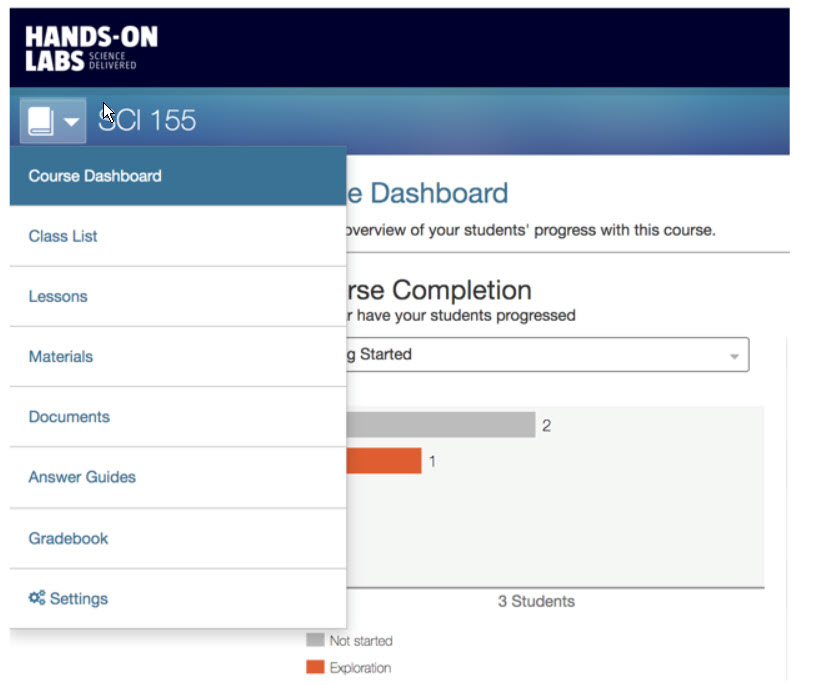
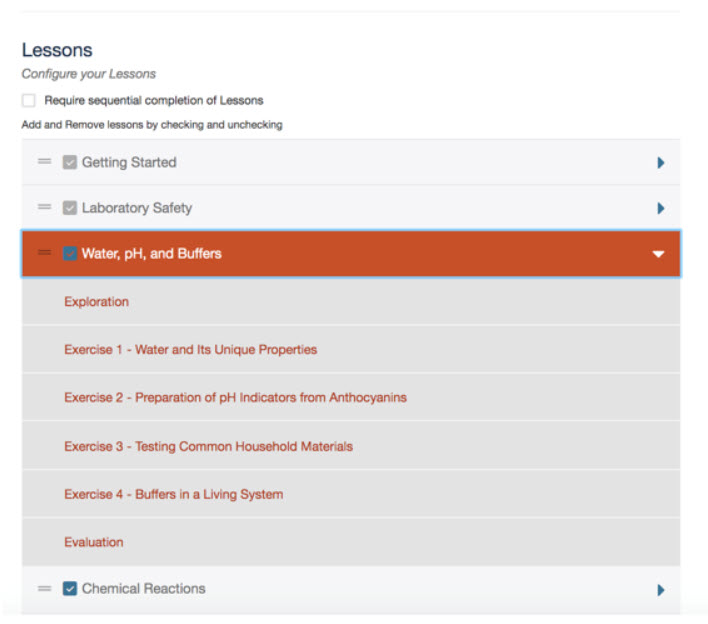
Lessons will take you to the list of all the labs, clicking on an individual lab will take open the contents of that lab. Click on any section to go to that part of the lab. Make sure that the “Require sequential completion of Lessons” box remains unchecked.
Materials lists all the materials needed for each of the labs.
Documents takes you to a page where you can upload resource files
Answer Guides allows you to download a pdf of each lab complete with sample data and answers.
We will not use the HOL Cloud Gradebook. The grading feature on HOL does not support CCCO rubrics. Students will finish and submit their labs through HOL only to finalize the data. After that they will save as a .pdf through the browser’s print menu and submit through the D2L assignment folders. NOTE – again, for Physical Science courses, some of the labs will be “Formal” and students will create a totally different lab document to turn in.
Ongoing Student Support
Students will have access to the HOL Cloud as soon as the course opens. Before they get their lab kit in the mail, they should work through the Getting Started and Laboratory Safety lab Lessons. Place an announcement early in the course to encourage students to get started on those lessons. NOTE: depending on which course you teach, this may be ungraded. It IS graded and worth points for the Physical Science courses.
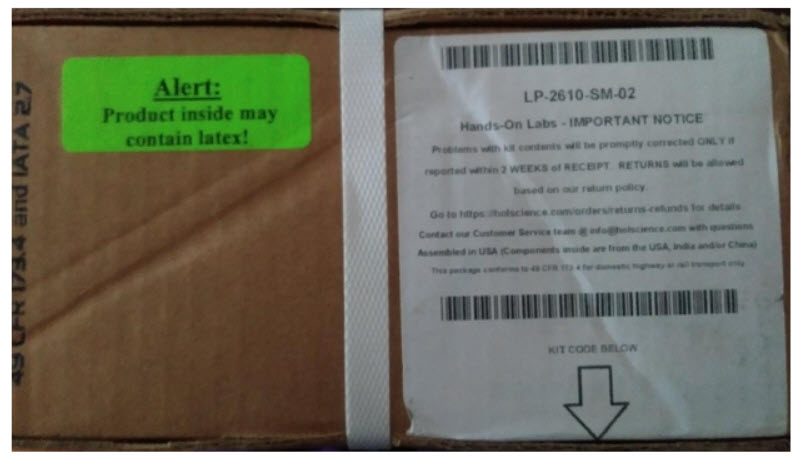
Students will not need to enter a Kit Code to access all of the labs even though there may be one printed on the lab kit box.
Depending on which course you teach, the below items will apply to you:
For Life Sciences:
When lab kits ship, check the student progress in the HOL Dashboard to see how the students are progressing on the Getting Started and Laboratory Safety prerequisites. Reach out as needed with a course announcement and/or email. Both of these lessons are time consuming. Students who leave them until the last minute will really put themselves in a hole. Because they are ungraded assignments, some students will need a push to get the prerequisites completed. A week before the first HOL Cloud lab is due, place an announcement in the D2L classroom with a quicklink to the KB article Navigating HOL Labs in the Lab information section of the Syllabus menu.
A few days before the first HOL Cloud lab is due, place an announcement in the D2L classroom with a quicklink to the KB article How to Create and Submit your HOL Final Report in the Lab Information section of the Syllabus menu.
For Physical Sciences:
Within the first 7 to 10 days of the semester, the students will need to have completed both the Getting Started and Laboratory Safety prerequisites. Note that to open future D2L Assignment folders, the students will have needed to complete the Laboratory Safety activity. So it will be important to check for these submissions and remind your students to complete it.


