;)

;)


;)
;)
;)
;)
;)
;)
;)
;)
;)
;)
;)
;)
;)
;)
;)
;)
;)
;)
;)


;)
;)
;)
;)
;)
;)
Make sure you are logged in to D2L and at the Zoom Integration home screen.
Step 1: Select the Schedule a New Meeting button in the upper right-hand corner.
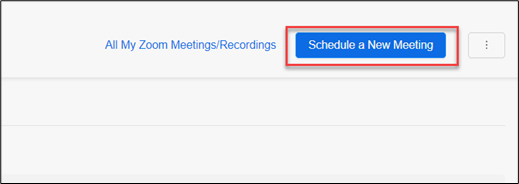
This will take you to the Schedule a New Meeting page where you can begin to fill out the meeting options that you desire.
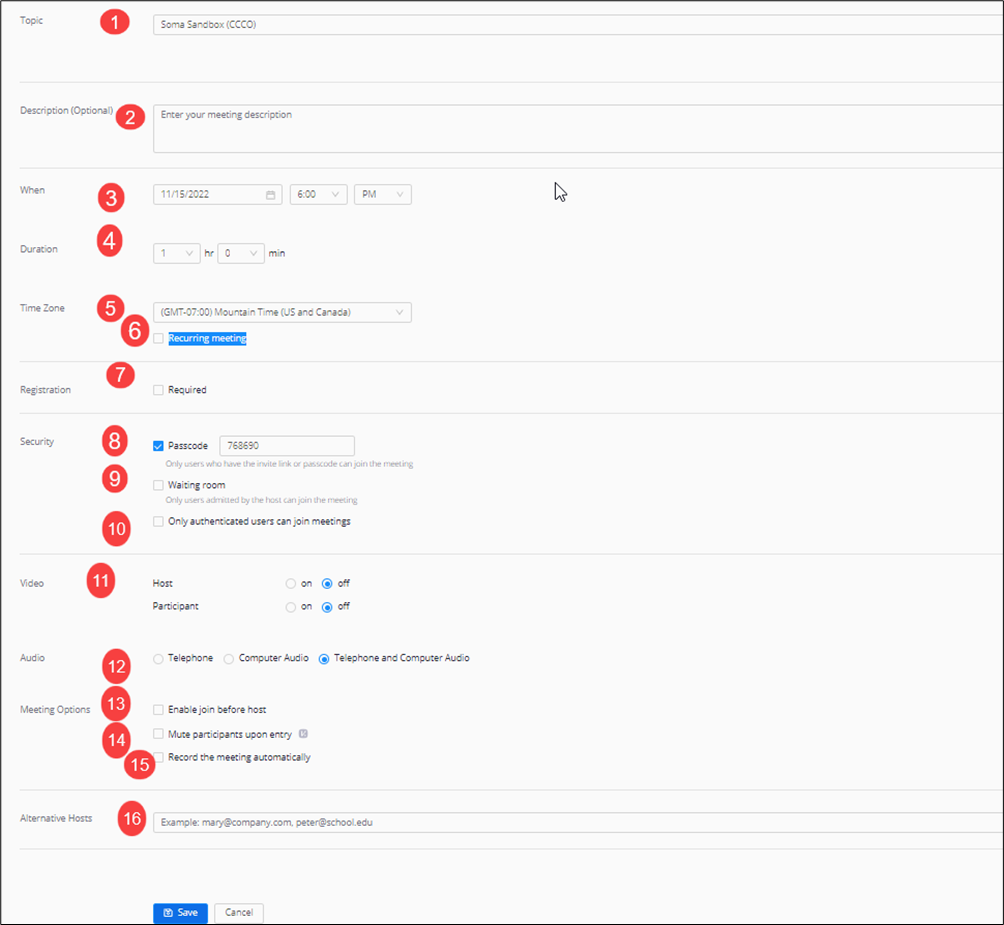
- Topic: Enter in the name (or title) of the meeting. Note: Be as descriptive with the name of your meeting as possible.
- Description: Enter in a description about the meeting. (This is optional)
- When: Choose the date and time for the meeting. You can start your meeting at any time before the scheduled time.
- Duration: Choose the meeting duration. This is only for scheduling purposes. The meeting will Not end automatically after this length of time
- Time Zone: By default, Zoom will use your computer's time zone. Select the dropdown menu to choose a different time zone.
- Recurring Meeting: This is Optional. Choose if you would like a recurring meeting, i.e., the meeting ID will remain the same for each session. If checked, you will then have the options for Recurrence (Daily, Weekly, Monthly, No Fixed Time), Repeat every (number of days) Day, and End Date (Specific date or After 1-20 occurrences).
- Registration: Allows you to have your participants register with their e-mail, name, other questions, and custom questions.
- Security Passcode: You can select and input your meeting password here. Participants joining the meeting via entering in your meeting ID will be required to input this password before joining your scheduled meeting. Those joining via the "join meeting URL" will not be required to enter the password as it is included in the link.
- Enable waiting room: Allows the host to control when participants join the meeting by placing them in a waiting room.
- Only authenticated users can join the meeting. This is optional.
- Host Video: Choose if you would like the host video on or off when joining the meeting. Note: If you choose off, the host will have the options to start their video after joining the meeting.
- Participant Video: Choose if you would like the participants' video on or off when joining the meeting. Note: If you choose off, the participant will have the option to start their video after joining the meeting.
- Audio Options: Choose what audio options you want to allow for the meeting (Telephone, Computer Audio, or Both)13. Meeting Options: Enable Join Before Host: Allow participants to join the meeting without the host or before the host joins.
- Mute Participants Upon Entry: This will mute all participants as they join the meeting. Note: This feature is only available with version 3.5.63382.0829 or later.
- Record the meeting automatically: Check this option if you want the meeting to be automatically recorded when first participant joins. You will have the option to record the meeting locally on your computer or in the cloud.
- Alternative Hosts: Enter the email address of an Alternative Host to allow them to start the meeting in your absence. Note that alternative hosts must have an active account with the College Zoom instance.
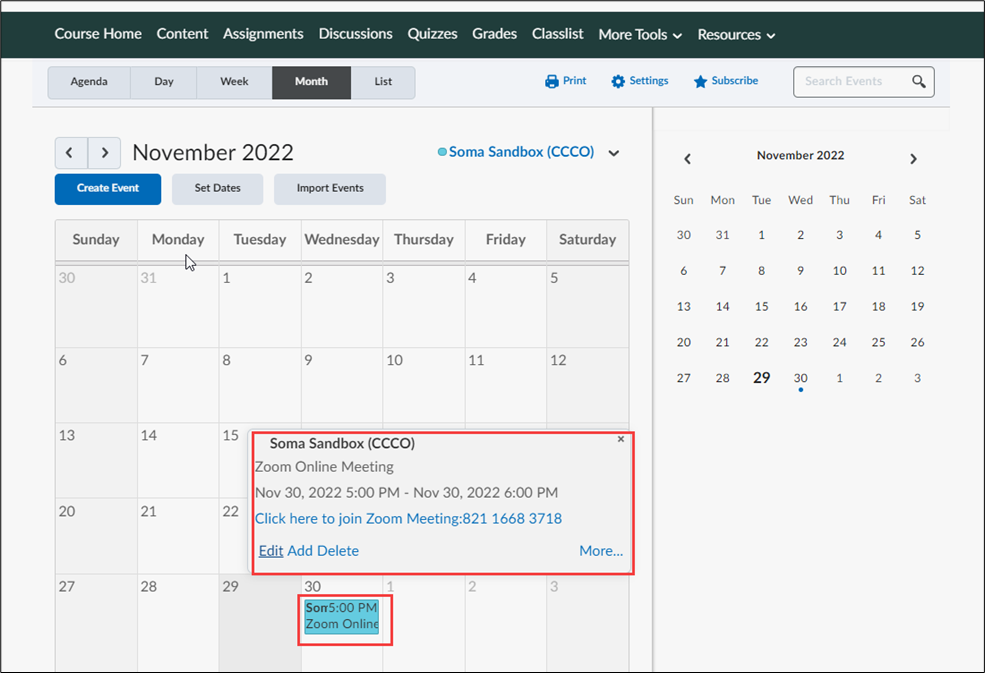
Step 2: Select the Save button when done. This will automatically generate a calendar event for the Zoom meeting and put it in the D2L Course Calendar.
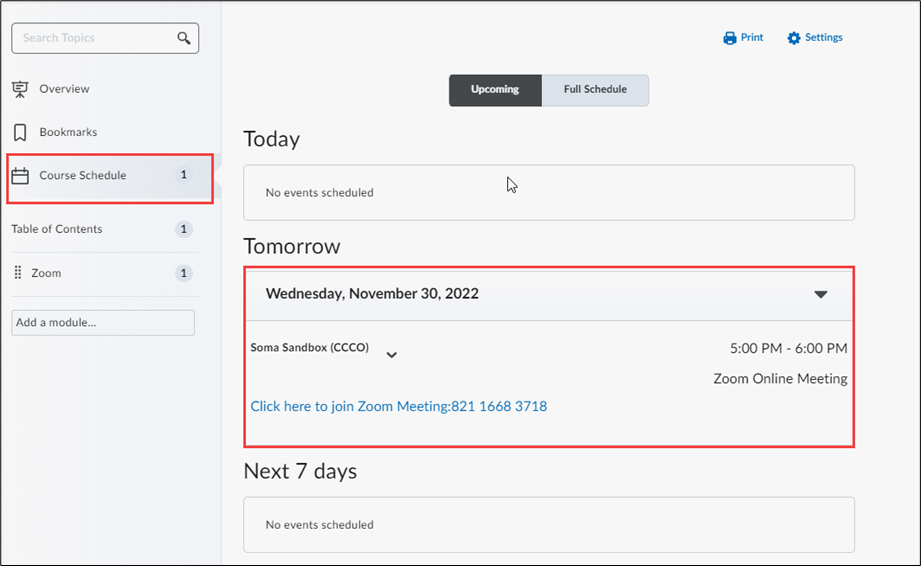
The meeting link can also be accessed from the Course Schedule.