;)

;)


;)
;)
;)
;)
;)
;)
;)
;)
;)
;)
;)
;)
;)
;)
;)
;)


;)
;)
;)
;)
;)
;)
;)
;)
;)
Webex Classroom Collaboration
Once you have completed Webex setup for your course (See “setting up webex in your course” if you have not completed that step), you will see a tab for “Classroom Collaboration” at the top of the Webex window in content. This guide will help you complete any setup needed for this utility.
The first time you go to the Classroom Collaboration tab from the Webex Education Connector in your course, sign in using your Webex Teams credentials (email/computer credentials). This will be CCC\S-number and the password you use to log into email and/or campus computers.
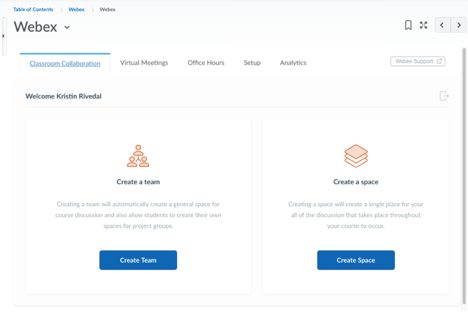
Team or Space?
The first decision you will make is whether to create a team or a space.
- A Team will allow you to create multiple spaces. These might allow you to create one space per module or per project. If you feel there will be value in allowing these conversations to occur in different threads, select “Create Team.” Note that this will also allow students to create their own spaces. Instructors will also be able to create multiple spaces and decide who has access to each. This can be helpful for group projects.
- If you want all Classroom Collaboration conversation to happen on a single thread for the entirety of the course, you can select “Create Space”
Communications
Send a Message
- You can post messages in the space that are visible to all the other users either in real time if they are online or when they sign in at a later time
- When you send a message to a space, all the members of that space can see your message.
- When you send a message to a person for the first time in Cisco Webex Teams, you create a conversation just between the two of you. The next time you message that person, your conversation picks up right where you've left it.
- From the Webex Education Connector in your course, go to Webex Teams > Spaces.
- Select the space or the person you want to send a message to.
- Write your message and press enter.
Share a File
Easily and quickly share a file, like a lecture notes or a group project, using Classroom Collaboration. You have a few different options for sharing files.
Drag and drop the file into the message area or click + Attachment and select a file.
Select Share to send the file.

